How to make a hair bow is a question any hair enthusiast has asked herself at one point or another. Attractive hair accessories in stores however, while cute and trendy, can often ring up for high prices. Instead, make your own stylish hair bows at home, using any number of tools and materials. A handmade hair bow is an excellent way to show off your locks, as well as ensure you are sporting a hair piece that can’t be found on the shelves of any store. Some techniques for how to make a hair bow can be used for craft projects for birthday parties, cheerleading meets, arts and crafts fairs and more.
Ribbon
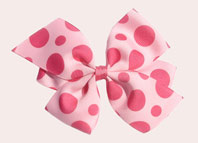
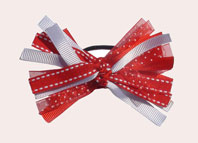
Ribbons are a natural choice when considering how to make a hair bow. Ribbons can be easily tied into a bow, so that the material already lends itself to handmade hair accessories. Plus, anyone can tie a basic bow with a length of ribbon, making it a simple craft that even those without a creative bone in their body can complete. And by using ribbon you already have on hand, the craft is inexpensive to boot.
There are all manner of ribbon types to consider using for a handmade hair bow. Silk or satin ribbons give a pretty sheen that highlights the hair attractively. Cotton ribbons are less delicate and costly, so it is a good alternative if the bow will need to hold up against long term use without falling apart. Whatever material ribbon you choose, make sure to pick a color that accents the outfit you will wear the bow with.
There’s more to how to make a hair bow than just picking out the ribbon, though. Cut the piece to about 12 inches long to have a good amount to work with. Gather the hair at the nape of the neck, or wherever you want it, then tie the ribbon in a knot around the hair so there is the same amount of ribbon left on each side. Finish by looping each side around the other and pulling, to make a proper bow.
Elastic
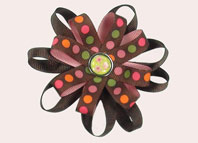
An elastic hair bow gives major versatility to the wearer, as elastic easily holds back plenty of hair and can be re-used time and time again. Any sort of elastic band can be used in how to make a hair bow, from the sort found at any common grocery store to small pieces of elastic cut at a fabric store and tied together by hand to make a loop. Make sure, whatever type you choose, that the elastic is thick enough to hold your hair without snapping.
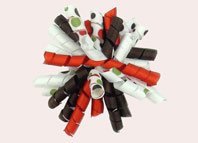
Adorn the elastic with embellishments to make a unique hair bow. You can snake beads of all colors and sizes onto a length of elastic before tying it off into a loop. Or, tie, pieces of decorative ribbon in knots around the loop of elastic, to get a frilly, fringed look. These ideas are just a jumping off point, as there are a multitude of ways to dress up plain elastic ties to make custom hair bows.
Clip
Clips make a great foundation for handmade hair bows, as clips can be found at any type of store and can be used in many ways in the hair. Look for plastic or metal clips with what’s called an alligator mouth, or an opening with two prongs that are opened and closed by placing pressure on the opposite ends. These clips can easily be customized to make creative and unique bows.
Adorn the clips with small trinkets that catch your eye, like beads, sequins or crystals. You can attach the embellishments using a heavy duty craft glue or Super Glue, so long as you choose a glue with good holding power. Or, choose instead to coat the clip in acrylic paint for a different look. Acrylic paint will adhere easily to the clip and resist scratching.
For a more traditional way of how to make a hair bow with a clip, consider making a small bow first from a piece of pretty ribbon. Then, simply attach the bow to the top side of the clip with a heavy glue. This gives you the classic look of a tied bow while still using the flexibility and convenience of the alligator clip.
Barrette
Barrettes have the flexibility of a clip, with a bit more hold. Barrettes are best used if you need to pull the hair back for some rigorous activity, like running or a sport like cheerleading. To make a unique handmade bow and still use a barrette, start with a quality barrette that features a well functioning clasp. This is the best way to ensure the bow stays in place once it’s put in the hair.
Barrettes typically have a flat, smooth surface, creating the perfect foundation for how to make a hair bow. For something incredibly unique, layer a thin coat of craft glue over the flat top of the barrette. Then, sprinkle some festive glitter over the glue so it sticks perfectly. Shake off any excess glitter and let dry, and you’ll have a shimmering barrette to show off in your hair.
You can still add a bow element on top of the glitter surface. Tie a piece of ribbon into a bow and glue it over the flat surface of the barrette. Or, use acrylic paint to paint the shape of a bow onto the barrette, so you still have a flat surface to the barrette. Make sure to let all of the different craft elements dry before placing in your hair.
Fabric
Fabric is a fine material to work with for how to make a hair bow. Materials like tulle, linen, cotton, satin and silk can be cut into strips and tied into the hair just as you would a piece of ribbon. You can use this technique to create just one bow in your hair, or use it several times to create a series of bows in pigtails or braids throughout your locks.
For a sweet alternative, use fabric strips to embellish other types of hair bows. A length of fabric tied into a bow can be glued to a clip or barrette. Or, tie pieces of decorative fabric in knots around an elastic tie to create a fringe that flares out when tied into your hair. There are any number of possibilities when working with fabric pieces to make cute hair accessories. Plus, you can use up scraps of fabric from other projects, so you’re saving costs while finding a use for material that might otherwise have gone unused.
Whatever technique you use for how to make a hair bow, the outcome will be a beautiful and unique piece that you and those around you adore. Get friends in on the act and design a whole slew of different bows, so you get some cute accessories and a fun afternoon with the girls out of the project. The end result will be a set of bows you’re proud to don. With just a bit of know how, the problem of how to make a hair bow won’t have to be so daunting anymore.
Sign up for our newsletter and get the latest news, promotions, product info and more!

Valerie Longhurst, Instructor
I simply adore crafts and love teaching others how to make hair bows!
 100% Satisfaction Guarantee
We are so sure you will absolutely love our product that we offer a 30 day no questions asked money back guarantee!